Showing posts with label technical tips. Show all posts

Friday, April 24, 2026

Problem with a Royal Enfield? It's simple

 Online motorcycle forums are great places to learn about vintage motorcycles, and get advice curing them of occasional ills. 

The owner of a 1970 Royal Enfield Series 2 Interceptor issued once such challenge recently to members on the REInterceptor forum

"I took it for a ride today and all is good... until I get to high RPMs. That's when it starts cutting out. The tank is clean and petcock filters are clear. Filters on the bottom of the carbs are clear. I have new plugs and coils. I have never replaced the coil to plug wires. Any other ideas?" Jim wrote. 

I was amused that almost the first response offered was the time honored suggestion for curing all Royal Enfield ills: 

"Check that the fuel tank cap vent is not plugged." 

If only life were so easy. It's worth checking, but I am pretty confident this is never the cause of problems. How would the vent have gotten plugged? 

More complex advice started coming fast.

Cutting out misfire. Typically a sign of lean mixture; what main jets are you running? What plugs are you running? What is high rpm?

"There are fake spark plugs that will not give a good spark at high rpm, so first thing, put your old plugs back in."

Has fuel changed to E10 in your neck of the woods? Is the fuel more than two months old?

Gas starvation? Did you fit new petcocks/gas taps? Are you turning on both taps?

Could you have counterfeit spark plugs?

The owner dutifully checked all these things. He replaced the gas, double checked the plugs, double checked the points, opened both taps, checked wiring, and on and on and on.

Then he found the real problem.

"The problem was the choke lever. Oh My God. The lever was wandering back to a point where it was semi choking the engine. So I tightened the screw and went for a ride today. And all is good. The (bike) goes like a scalded ape!"

Did the forum members feel cheated? Did they resent being bothered with a simple problem?

Not a bit of it.

"That's great news," one member responded. "Some things can drive you crazy."

Problems with your vintage motorcycle? Try the forums. You have friends out there.

Friday, March 24, 2023

Old Royal Enfield smoking? Easy cure

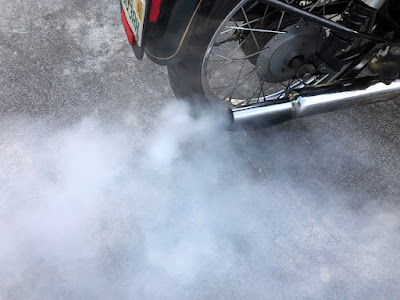
Smoke from motorcycle exhaust pipe.
Wet sumping causes oil to burn off in clouds of smoke.

 I cured my Royal Enfield of wet sumping by replacing one little part. 

SHORTCUT TO THE SOLUTION: I replaced the worm nut, with its bonded-in seal. That did it. 

It is an easy fix and requires only a screwdriver and a wrench. 

My 1999 iron-barrel Royal Enfield Bullet long ago began smoking when started up, especially after sitting for a few days. Obviously, oil was seeping into the crankcase, turning the Bullet's intended dry-sump design into a wet sump. 

Oil splashed up from the unwanted pond of oil in the crankcase on start up was getting into the combustion chamber and being burned off there. 

Being lazy, I addressed this problem by simply removing the front drain plug below the motor, which drains the crankcase. It was a messy nuisance to do this chore before each ride, but it worked. 

Then, one day, things got suddenly much worse.

On start up there was thick and persistent white smoke from the exhaust that wouldn't stop. My impression was that this wasn't just a case of a pool of oil being burned off, but a steady stream of oil being continually turned into smoke as the engine ran.

Checking the spark plug I found it heavily coated with oil. Obviously, oil, a lot of it, was getting into the combustion chamber.

I drained the sump and measured what came out: about 8 ounces, much, much more than recommended but actually typical for my Bullet, when it has been standing unused for awhile.

Even with the sump just drained, and less than the recommended amount of oil now on board, the Bullet now immediately smoked heavily on start-up and wouldn't quit smoking.

I wondered if the explanation might be in a 2015 post on the Classic Motorworks Forum by Kevin Mahoney, former U.S. importer of Royal Enfield motorcycles. He wrote about a fault in some 1999 Bullets that led to smoking.

Was this my problem?

I wrote an email to Kevin to ask, and he was gracious enough to answer.

"It is HIGHLY unlikely that is your problem," he replied.

"It is more likely to be your worm nut seal. They are a wear item and we used to sell a lot of them...

"It's a little hard to visualize until you've seen it with your own eyes, but the oil that is fed to the crankshaft by the rear pump is separated from all of the oil in the timing chest/cover by the rubber seal in the middle of the worm nut... 

"If the leak outstrips the engine's ability to clear the oil out of the crankcase, oil will be forced past the rings and it will make smoke...

"If you end up with (excessive) oil in the crankcase, then call or email Tim Hirdler and get a worm nut and a timing case cover gasket coming. The worm nut should be replaced from time to time anyway."

A busy holiday season and houseguests interfered, but I eventually ordered the parts from Tim at Western Cycle Supply and installed the new worm nut in my smoking Bullet.

Worm nut held in front of timing chest cover.
Oily, worn out worm nut removed from inside the timing chest cover.

To do this you remove the timing chest cover, the big kidney-shaped slap of metal that forms the right side of the motor and includes the oil filter housing. You must remove 10 flathead screws; be careful to keep them in order: they are different lengths. (I stuck them into holes in a cardboard box, in the shape of the primary cover itself.)

If you're careful, the cover gasket may be left intact and could be used again. (You might not need to remove the motorcycle's exhaust pipe to remove the timing chest cover, but I did, just to get it out of the way.)

Once inside, being careful not to disturb the gear wheels of the valve train, you remove the large hexagonal worm nut.

IMPORTANT: This worm nut is left-hand thread. It's RIGHTY LOOSEY not RIGHTY TIGHTY as you'd assume.

You'll have to keep the motor from turning as you do this. I just put the motorcycle in gear and held down the brake pedal to keep the rear wheel from turning.

Once removed the old worm nut didn't look bad, but its central rubber seal was slightly loose. Was that looseness causing my problem?

Put everything back together. The trickiest part is making sure to mesh the threads of the new worm nut and the oil pump spindle (you'll see the spindle gears peeking out from the cover near the filter housing). You don't want to seal everything up with those gear edges clashing. Gently rotating the motor with the kick start lever (or the rear wheel while in gear) are suggested while fitting.

My next step was to drain the crankcase, to see if the new worm nut was indeed what it took to stop the seepage.  It would certainly be good news if I discovered very little oil in the crankcase in the morning.

When I opened the front drain plug I could have done a cartwheel in joy (if I wasn't too old to be doing cartwheels). Much less oil than usual drained out the crankcase plug.

The Bullet started and, after warming a bit, it didn't smoke. I rode a couple miles and still no smoke!

Very happy.

After the ride the spark plug was dirty, but not oily.

I'm hugely pleased.

ADMISSION: To keep this story short I left out the number of times I experimented with siphoning oil from the tank, draining the crankcase, cleaning the plug, and being discouraged by residual oil continuing to cause smoke clouds on test starts. Replacing the worm nut and its attached seal ultimately did the trick, but it took the motor time to clear up.

Friday, December 30, 2022

A secret fix for Toyota door handles

Door handle in front of Toyota Camry door.
I never thought I would have to repair my Toyota.

 I don't mind repairing my old Royal Enfield Bullet. That's just part of owning a vintage Royal Enfield. 

I do mind having to repair my Toyota. 

It's no excuse that my 2012 Toyota Camry is not new. Toyota's reputation for reliability, no matter how old the car, is why I bought it. 

But annoyance turned to respect when I discovered that Toyota anticipated that this very repair would be necessary, and made it easy. The engineer's shocking foresight fully restores the company's reputation in my eyes. 

Here's what happened: My wife ripped the door handle off the passenger-side front door.

No, she's not an Amazon. What I think happens is that the driver (usually me) often doesn't remember to click the fob twice to undock all the doors, since the driver's door alone unlocks with a single click.

The result of this is that the passenger pulls the door handle and, not feeling the lock give way, continues to pull hard until the mechanism gets a powerful jolt.

Eventually, the plastic door handle snaps off inside the car door, at its fulcrum.

Ordinarily, I'd expect to have to disassemble the entire interior side of the door to access and repair or replace the door handle. But no!

Toyota anticipated that this would happen. And so, on the front doors it provided a small hole, visible only when the door is open, and sealed with a grommet. Stick a tool into this hole and loosen a single screw and the door handle comes off, ready to be replaced.

Access hole in side of Toyota Camry door.
Loosening one screw inside this hole made it easy.

One single screw is all it takes. But get this: the screw doesn't have to be somehow retrieved from inside the hole, and it won't drop into the body of the door (gone forever) because two tiny plastic arms keep it from falling.

Hooray!

But wait a second. If Toyota is so smart, why did it not provide a similar shortcut on the rear doors. Don't their door handles break off too?

Sure they do. They're essentially identical and probably no stronger. But, being on the rear doors, they are surely pulled on less often. Unlike the front door handles, the rear ones probably will last the lifetime of the car, saving the cost of drilling the hole and plugging it with a grommet.

They really thought this out.

Now I am disappointed that simply gluing the handle back together with Super Glue didn't fix it. The first passenger who didn't know to "baby" it immediately broke it off.

Toyota no doubt expects me to order an intact replacement handle. Unfortunately, these don't seem to be available in the exact color of my car (True Blue) and they aren't cheap.

So I'm working on a solution that will make a sterner repair. Wish me luck.

My thanks to YouTuber TROY-NEIL Findley, who posted a video alerting me to the "secret" hole in the Toyota door that makes this repair a breeze. All you need is a No. 30 Torx bit to loosen the star screw.

Friday, October 18, 2019

There's a trick to changing Royal Enfield gearbox oil

Collection of tools and supplies for changing gearbox oil.
Pan and absorbent paper to catch spills, wrenches and a clean, empty plastic bottle with a squirt lid.
I decided to change the gearbox oil in the old-fashioned Albion four-speed gearbox of my 1999 Royal Enfield Bullet.

My gearbox is a separate unit. The transmission is not packaged to share oil with the motor, as it is in modern Royal Enfield motorcycles.

That means my gearbox oil didn't get changed every time I changed the motor oil. No. In fact, over the years, there never seemed to be any reason to change it at all!

For one thing, my old Bullet used to leak heavily from the gearbox. The side behind the primary drive mechanism — and therefore out of sight and out of reach — apparently wasn't sealed correctly.

Eventually a mechanic fixed that, fitting a proper sealing ring. But until that happened, everything I put into the gearbox was soon flung out, onto the motorcycle. What a mess.

Of course this made for the continual necessity to "top up" the gearbox with new oil. In failed attempts to keep it from pouring out I experimented with all kinds of ever thicker lubricant: Lucas oil, gear oil, grease ("elephant snot") anything that seemed likely to stay put. Of course, nothing did.

But once the seal was installed, the gearbox became virtually maintenance free. I can't remember ever draining and refilling it, in more than 42,000 miles of riding.

The time had come.

Oil drip on drain plug.
View from below: drain plug obviously leaks a bit.
To my surprise, not much came out when I removed the drain plug at the bottom of the gearbox. Perhaps, since the oil seemed to be staying in, I had allowed the level to get low. (There was a slow drip from the drain plug I had always ignored — shame on me.)

Now, only one cup of old oil came out. Probably the grease I'd shot into the thing is still in there, never to emerge. So how much oil to put back in?

Measuring cup of dirty oil next to gearbox.
Only one cup of dirty oil came out.
Luckily this is not a problem. In addition to the drain plug on the gearbox bottom there is a filler plug on top AND a very handy plug on the side. You fill the gearbox with oil until it drains out of the side opening. Those old-time designers were clever.

Plug and opening in front side of gearbox.
Plug opening on front side of gearbox will weep oil when gearbox is at correct level.
Since one cup of oil had come out, I would start with one cup of fresh oil and add more as needed to reach the side opening.

But what kind of oil?

I'd been "topping up" with Castrol 20W-50; conveniently enough that's the oil I use in my motor. But I'd recently read a note on the Royal Enfield Interceptor Yahoo group that gave me pause. Modern "EP" (Extreme Pressure) oils may contain additives that damage the old-fashioned gearboxes, it said.

Luckily another member of that forum immediately chimed in with this reassuring message:

"Experience shows that the original bushes tolerate the Castrol EP nicely. The EP is essential for the life of the gear-wheels! They don't stand a chance with ordinary, modern engine oil, i.e. without the EP additives. I have a box full of pitted gearwheels to prove the point."

Chris Overton, a Royal Enfield enthusiast on the Interceptor group, also assured me that I was on safe ground.

"20W-50 will work just fine, and I use it," he wrote. "Even better is 85W-140 gear oil. The product I buy here is extreme pressure (EP) and comes in a round, one-liter bottle. It has a pointy spout so you can squeeze it directly into the gearbox without using a funnel. Don't let the higher viscosity number confuse things. Engine oil like 20W-50 has viscosity measured at 300 degrees, its temperature in a hot engine. Gear oil has viscosity measured at room temperature so gives a higher number."

Looking into opening we see that it is not very deep.
See why you can't use a funnel to add gearbox oil?
Metal just below the opening keeps the funnel out.
He added: "A good check to do on any drained oil is to tip the drain pan slowly side to side in bright sunlight, looking for any sparkle of metal flake. You are not likely to see any but, if you do, it is a warning," he added.

Checking, I did indeed see golden sparkles in the oil. But they were minute and I figured that they probably represented normal wear in more than 40,000 miles of city riding, with the gearbox in constant use.

So now all I had to do was refill the gearbox. First I rubbed a bar of soap against the threads of the drain plug, to provide a barrier against that slow leak I'd noticed, and reinstalled it.

Of course, my container of new 20W-50 oil doesn't have the "spout" Chris suggested. So I carefully cleaned out a plastic dish-soap container to use for squeezing oil into the gearbox. I poured my one cup of fresh oil into it and went to work.

Plastic bottle of new oil above filler opening.
It worked! Squeezing the plastic bottle slowly and gently inserted oil without a drip.
I admit I expected this to fail. The reason you can't just use a funnel to add oil to the gearbox is that the opening only goes in a very short distance before making a very tight turn. The nose of the funnel won't go far into the opening and the oil quickly backs up and slops over the exterior of the gearbox and on to the floor.

But Chris was correct. My squeeze bottle shot oil into the hole under enough pressure to make the turn without backing up and overflowing. When I stopped squeezing, the plastic bottle puffed out, creating suction that practically stopped the flow of oil out its tiny nozzle, and giving the opening time to clear before I gave it another shot. A great trick!

Oil drools out of opening in front side of gearbox.
Overflow from the side hole told me the gearbox oil was now at correct level.
Using this method I was able to get about 1.25 cups of oil into the gearbox before it began weeping out of the side, "indicator" hole.

I replaced the top and side plugs and declared the job done. Now for a test ride.

But before I did that I wanted to try one more thing. Yup. If you don't want to bother using a separate squeeze bottle, as I did, the top of the soap bottle I used fits just fine on the Castrol 20W-50 container. I could have just used it to squeeze oil into the gearbox.

Plastic bottle cap with squeeze opening.on Castol oil bottle.
You can skip cleaning out a dish soap bottle and just put its lid directly on your plastic oil bottle.

Friday, March 1, 2019

Replacing switch lights up my Royal Enfield brake light

Brake light at back of Royal Enfield is illuminated.
My brake light now lights up when front brake lever is applied.
The front brake lever on my 1999 Royal Enfield Bullet now makes the brake light go on. Again!

For years I've been riding around without being able to make the motorcycle's rear brake light go on except by pressing the foot pedal that operates the rear brake.

So what?

Surprisingly, this does matter, because there are moments when coming to a stop that my foot is not on the rear brake pedal. Instead, that foot is busy pressing on the gearbox neutral finder so that I will be in "neutral" when I come to a stop.

This only takes a moment, but it has meant that I am coming to a stop without the rear brake light glowing. Not scary, in most traffic, but not ideal.

Old and new handlebar brake light switches.
Old front brake switch, left, new on on right.
Now, finally, I have replaced the worn-out switch behind the handlebar brake lever. The replacement switch makes the rear brake light glow just as intended.

Why did I leave the switch broken literally for years and tens of thousands of miles? Actually, I didn't. I recall taking the switch apart at least twice and getting it to work again. Soldering was involved, I dimly recall.

But there were 60 stop lights — by actual count — on my daily commute and, although I didn't hit them all, the brake lever got a real workout.

Old and new brake light switches.
Old nub on brake light switch, left, fresh nub on right.
Looking at the original switch, now removed, I can see that thousands of applications wore down the tiny plastic nub that pressed against the lever. Incredibly, the nub still moves back and forth, the spring inside the switch apparently still doing its job. Probably the contact points inside the switch are broken or worn down past the point they can make contact.

Lloyd Gibbs of the UK is the reason I finally got around to replacing the switch with a new one. He messaged me letting me know that he had replaced the levers on "Old Clunky," his Royal Enfield Bullet. He was selling his original Magura front brake lever on eBay.

The Magura levers were used on Royal Enfield Bullets produced before June, 1999, and they have been near impossible to find just forever. I didn't need the levers, but I sure needed the brake light switch behind the front brake lever. Did he have the switch?

Light switch and wire with Enfield "genuine parts" package.
New switch and lead wires for the front brake lever.
Yes! In fact he had a new one still in its Royal Enfield parts bag (apparently Lloyd replaced his switches as needed instead of getting by without).

He was kind enough to ship me the switch. No mechanic, I was delighted to see that this would be a case of "plug and play." The new switch even had the same color lead wires as the original, running inside a black plastic tube.

This was important to me because the horrible spaghetti bowl of wires inside the nacelle of a Bullet of that era is daunting. It is a witchy-tight knot of wires. I knew if I started disconnecting them I would never be able to get them together again.

Jumble of wires inside motorcycle headlight nacelle.
Tight, jumbled knot of wires inside nacelle.
See the dab of white paint I used to mark the old brake wire tube?
I managed this job by first cutting the old blue and green lead wires and then, one-by-one, gently pushing on all the various blue and green wires in the bundle, watching to see which ones moved the remaining lengths of my loose wires. Those would be the ones I needed to connect to my new switch.

It was a touchy job, but I was lucky and the brake light came on the first time I tried it.

My thanks to Lloyd.

UPDATE: I remain grateful to Lloyd, but the sad fact is that the new switch stopped working by June 1, 2019, a short four months of life since its installation. Connecting (with a jumper wire) the two wires downstream from the switch does trigger the brake light. So the problem does appear to be the switch itself. Something more robust is needed!

Friday, January 4, 2019

How I wash and wax my 1999 Royal Enfield Bullet

No costly wax for my precious Royal Enfield. I use this stuff.
But this is not an advertisement.  Find any product you like.
So I take my 1999 Royal Enfield Bullet out to get gas, since I plan to be away from home for a couple weeks, and I like to leave the tank full to fight rust.

I get the bike good and warmed up. I love the way it shifts now. It took a lot of work to make my left-shift four-speed Bullet shift better.

Once back home I let the motorcycle cool for awhile and then wash and wax it.

I use Zip Wax, my usual. It cleans and leaves a shine. Since it's a liquid, not paste, I'm confident it won't damage the paint or leave swirls. This is not an advertisement. This is not sponsored content. I use this stuff, but you may find something you like better.

I apply the soapy solution from its bucket of water, using enough on the cloth to soak off the dirt but not enough to seep into the electrics. I start on the tank, and work down to the dirtier parts.

I dry the bike as I go. There's no need to hose it down — I'm thinking about not soaking those electrics again. There's no need to buff the wax. Once wiped with a damp towel the bike simply air dries.

As the towel moves over the fender it detects a loose screw holding a stay. It's always the same one that gets loose, from vibration. I tighten it. The screw has moved around enough to wear off the paint around it. I make a mental note to remove it and touch up the paint when time allows.

With the Bullet now dry and shiny I put some fresh motor oil on a rag and go over the chrome. It's the only sure way to avoid rust. For now the oil sheen adds to the shine, but it will get dirty fast. Better that than rust.

The final step is to wipe clean and oil the chain. I apply used motor oil with an old toothbrush, trying to work the oil into the rollers. That's where wear happens that can ruin sprockets. Replacing sprockets is expensive.

The process of oiling the chain feels more like basting than lubricating. I wipe off the excess — oil left on the exterior of the chain does nothing but attract grime.

With the bike now ready to sit unused in the garage for a couple weeks, I pull an old bed sheet over it. The old cotton sheet is worn thin and soft from a hundred washings. It won't trap moisture the way an expensive motorcycle cover might.

I switch off the garage light and close the door. I'm already thinking of our next ride. It was a good day.

Friday, July 6, 2018

The Royal Enfield starting mistake I always make

I recently blogged about the 10 steps you perform in kickstarting a classic Royal Enfield Bullet motorcycle.

There is actually an 11th step I invariably do — after the first 10 don't work!

There I am, kicking and kicking. I check the petcock. Gas is on. I check the kill switch. It's on "Run." I check the ignition; re-position the piston to the ideal spot; plan my kick carefully so I follow through completely.

And — nothing.

So, eventually, I decide to take my own advice on what to do when a Royal Enfield Bullet won't start.

I get comfortable. I take off any riding gear I've donned. Perhaps I get a soft drink. I just relax.

And it's usually then, looking casually at the Bullet, that I'll notice it: The high-tension wire to the spark plug. It's off.

Again.

I took it off the last time I removed the spark plug to clean it. I should have put it back on when I put the plug back in.

The high-tension lead doesn't do any good if it's not on the spark plug.
But, for some reason, I don't always do that. The Bullet only has one spark plug. It can't start without that spark.

I've learned this lesson before. More than once.

Apparently, I am doomed to learn it again from time to time.

Friday, October 13, 2017

The 10 steps to starting a classic Royal Enfield Bullet

I like to start my Royal Enfield Bullet with the motorcycle safely on its center stand.
Nothing is more fraught with significance than starting your classic iron barrel Royal Enfield Bullet motorcycle. Especially if someone is watching.

Are you not man enough to kick start a motorcycle?

And how are you going to get to the motorcycle rally if your Bullet won't start? Drive your car? You would never live that down.

Here's the starting procedure I employ every time I start my 1999 Royal Enfield Bullet after it has been idle for a few days or a week. Advice here applies to these old fashioned Bullets. If your Bullet has electric start there will be other considerations, such as raising the kickstand.

1. Put the Bullet on its center stand. I prefer starting the Bullet while standing next to the motorcycle with it supported on its center stand. This eliminates trying to balance the motorcycle while astride it. It also means that you can delay putting on riding gear until the motorcycle is running.

Clean the spark plug (or change it) to ease starting.
2. Clean the spark plug. This only takes a moment and it's cheap insurance against having to huff and puff on the kickstarter, hoping a random spark will occur.

Drain the sump (by removing the most forward drain plug.)
3. Drain the oil out of the sump. Oh, you thought this was going to be easy, huh? Do you want your Bullet to produce clouds of smoke when it starts? How is that going to look? Classic Bullets may "wet sump" if left sitting for even a day or two. Small amounts of oil leak into the sump and will smoke up the whole neighborhood if you don't remove it before starting the motor. Replace the plug. You will need to add oil to replace the amount you drained off.

If you drain off significant amounts of oil, you must replace it.

Put the kill switch in the "Run" position.
4. Move the kill switch to "Run." DON'T IGNORE THIS STEP.

Turn on the fuel supply.
5. Move the fuel tap lever to "Run." The lever points down towards the ground when it is in the Run position.

Hold the clutch lever and kick until the kicker goes limp.
6. Free up the clutch by squeezing the clutch lever and kicking the kick start lever until it goes limp. Bullet clutch plates tend to stick together if left in contact. Unless you free them up this way you may get quite a jolt the first time you put the gearbox in first gear with the motor running.

Turn up the idle. Slightly open the throttle as you do this to save wear on the knob.
7. Rotate the idle control (knurled metal knob on side of the carburetor) clockwise half a turn. This increases idle speed, so if the motor does start, it will be likely to keep running. Once the motor is running cleanly you can turn the knob counterclockwise to reduce idle speed to your liking.

Hold the decompressor open as you gently move the kickstart lever to move the piston past compression.
8. Turn on the ignition and set the piston. The idea here is give your kick the best possible chance to fire the motor by placing the piston in the ideal position. Just press on the kick start until it encounters firm resistance (compression). Now press the decompressor lever with your thumb and gently press just a little bit more on the kickstart to move the piston just past compression. With the ignition on you will see the amp meter flick from discharge (left) to near center (right) as the piston reaches the correct position.
With the ignition on and decompressor open, watch for the amp needle to swing right.

You may or may not need the enricher to start.
9. Set the enricher lever by pushing down on the lever on the carburetor.

10. Now kick start the motorcycle. Your kick should be long and fast. Strength is not the issue. Kick confidently and kick all the way through. IF YOU USED THE ENRICHER LEVER be sure to push it back up once the motor is running or your spark plug will foul.

Didn't start? Go back to Step 8 and try again, this time without using the enricher (Step 9).

Friday, November 18, 2016

Annealing washers: How to stop Royal Enfield oil leaks

Tell-tale oil drip from sump plug of my 1999 Royal Enfield Bullet motorcycle.
I decided to fix the oil leaks on my Royal Enfield motorcycle.

The problem is oil leaking from the sump plug on the bottom of the motor and the drain plug at the bottom of the oil tank at the back of the motor.

Simply tightening the plugs is not the answer. It doesn't take much tightening to get these in so firmly they are nearly impossible to remove next time you need to open them.

Swearing and busted knuckles will be your reward for over tightening the plugs. If you're not careful, you'll easily round off the lands of the plugs, making removing them even more difficult. I eventually had to file the lands down to fit the next smallest sized socket in my workshop.

As I so often do, I turned to the experts on the Royal Enfield Yahoo Group for help. You don't necessarily need to pose a fresh question, as many have already been asked and answered. You can search thousands of helpful answers, back to 1999.

Just tap "Conversations" and then fill in your question in the "Search Conversations" box and hit "Enter."

Battered copper washer shows the damage caused by many tightenings.
This is how, in 2004, I found a solution that seemed to work — a bar of soap. I kept one in the garage and when it was time to reinstall the plugs I would rub the threads on the soap bar, depositing some soap as I did so.

This was suggested for a leaking fuel tap, but for years it did seem to work on the engine oil drain plugs.

The theory is that when the leaking petrochemicals encounter the soap it turns into jelly. This is said to be the recipe for napalm (jellied gasoline). The jelly stops the leak.

And it worked, or seemed to, for awhile. But, gradually, it wasn't enough. Invariably the Bullet would "mark its territory" on the garage floor.

It seemed as though the copper washers that are the plugs' primary defense against leaking were getting battered and thin. They clearly showed the gouges caused by tightening the plugs down on them.

Again, I turned again to the Yahoo Group for help, and found this, from member Bill van Dijk:

Annealing: Washer glows red under flame of blow torch.
"Over many years I had collected a box full of various copper washers, some the correct size, but a bit too hard for the bike. A great way to really soften them up is to hang them from a piece of wire, and heat them dark red (with a small propane torch or something like that), and drop them in cold water. This produces a very soft washer which seals very well, and can be used many times over."

The process is called annealing. Copper, when it's worked (stressed) becomes hard and brittle.

Heating to red hot and then cooling (it's OK to let it air cool) returned my washers to respectable, if not perfect appearance.

Did they stop the leak? On next inspection the plugs were not leaking oil, although their surface was slick and oily. I hope to find a local source of replacement copper washers, figuring that new ones less battered than mine may work still better..

The washer after annealing looks better, but not perfect. I wish I had made sure
to always keep a smooth side without gouges toward the motor

Tuesday, February 9, 2016

How to fix broken Royal Enfield front turn signals

A Royal Enfield Bullet front turn signal, before the stalk breaks.
You have to be pretty stubborn and pretty cheap to put up with the Department of Transportation approved turn signals fitted to Royal Enfields in the U.S. back when I bought my 1999 Bullet.

There's nothing wrong with the big plastic signals themselves (except their appearance).

It's their stalks that (literally) let them down. Whether it's heat or age or vibration, the stalks snap, can not be repaired and, if you try, snap again and ultimately turn to powder in your hands.

...and this is that last intact turn signal with my broken ones.
Perfectly fine after-market turn signals are available inexpensively. But because I'm cheap, and stubborn, I've stuck with the originals. I now have a big collection of broken ones.

The solution I've come up with: ditch the stalks. Keep the turn signals.

The stalks eventually crumble and can't be repaired.
I've written before about how I attached the rear turn signals on my Bullet directly to the tail light housing.

I knew, however, that the front stalks would eventually break and so I came up with the following method for doing away with them at the front as well.

Naked bracket with turn signal removed. Note the two holes.
My plan eliminates the stalks and attaches the plastic heads of the turn signals themselves to the solid metal brackets on the motorcycle.

First, note that the base of each stalk has the threads that go through the bracket to be held by a nut. There is also a small lump of material sticking up that fits into a little hole in the bracket, to position the stalk in the bracket.

Note the little nub on the stalk that fits into the little hole.
The head of each turn signal, when disassembled, has a stout plastic tube, normally unseen as it's inside the stalk.

For each front turn signal, then, I rammed the plastic tube into the large hole on the bracket (it sticks in tight and, as it widens near the head, it won't go all the way in).

I drilled a small hole in the head of the turn signal, to fit a screw.
Then I ran a small screw through the little hole in the bracket into a hole I had drilled in the bottom of the plastic turn signal.

The result is not pretty, but the locating screw is largely out of sight. Time will tell if friction and the small screws are sufficient to hold the signals onto the motorcycle. They seem fairly solid.

This picture shows how turn signal head fits on bracket.
And the screw comes in to hold it.
From the front, I rather like the "close coupled" look of the new turn signal placement and they're less likely to catch on my clothing as I work on the bike in the garage.

Comparison shot: Stock on the right, refit turn signal on left.
If time allows in the future, I may enlarge the big holes in the brackets to allow the signals to come in closer and fit flush to the brackets. That will hide the short length of the little screw that currently remains visible and unsightly.

...and here's how it looks with both signals refit.

Monday, January 14, 2013

Wet sumping solution didn't work for my Royal Enfield

A coffee container seemed ideal for catching oil drained from my Royal Enfield.
My iron barrel Royal Enfield Bullet "wet sumps" if left unridden for a few days, a common problem. To avoid a cloud of white smoke on start up I have been draining the sump (through the farthest forward drain plug).

Just before starting I pour the oil I've collected back into the oil tank. Naturally, I want this oil to stay as clean as possible, so I can't use the filthy oil pan I keep for oil changes. Generally, this means I use some discarded but clean plastic food container.

Trouble is, those last few drops of oil from the sump don't tend to drop straight down into the yogurt cup or whatever other small container I've pressed into service: instead, they tend to run along the bottom of the motor, collect and then drop at will onto the garage floor.

I need a larger container to catch those drips, ideally one with a lid to keep it clean between uses.

You might recall that I once followed an on-line tip suggesting cutting down a plastic milk jug for this use. I tried it. No good. Aside from not having a lid (once cut open to make it wide enough to collect oil), it turns out that today's milk jugs are so flimsy that, when cut in half, they go all willowy and are hard to pour.

But aha! Taking out the recycling the other day I noticed the heavy duty construction of the wide-mouthed Folger's plastic coffee container. Here, it seemed, was the perfect container.

So clever did I feel that I cut a V-shaped slot into the can lip to facilitate pouring the oil back into the motorcycle.

Last few drops of oil run from hole along bottom of motor and miss the can!
But not so fast. The first problem was getting the plug out. The Folger's can fit beneath the motor, but left little room for me to turn the wrench and extract the plug. Once done, the last few drips still managed to migrate just beyond the width of the Folger's container and again hit the garage floor.

Only on attempting to return the oil to the oil tank did I realize the Folger's can was too wide to reach the oil filler opening. It banged into the motor and air filter housing. Only with a funnel was I able to catch the oil safely as I poured.
This isn't working! The can is too wide to get over the oil filler without a funnel.
Back to the drawing board!

Saturday, June 9, 2012

Royal Enfield brakes work better when they're rusty

The brakes of a Royal Enfield motorcycle work better when they're rusty. It's true, and the proof is in the April/May 2012 edition of The Gun, publication of the Royal Enfield Owners Club.

REOC member Brian Whittaker discovered that the front brake drum of his nine-year-old Bullet had become honed "to a mirror finish." The shoes could not get a grip on it. He took emery cloth to it but despaired when this proceeded slowly.

Over a cup of tea, he writes,  "I had a brainwave. I remembered my very first motorcycle, a dishevelled 1932 BSA Empire Star that had seen better days, but could stop on a sixpence because it had been left out in the rain a lot, so the brake drums had a nice coating of rust inside.

"My problem with the Bullet had been caused by too much loving care; I should have let it get, and stay wet more often!"

Adopting what he calls "alternative technology," Brian sprayed water into the drum and let it rust.

"Now my front brake works very well indeed, and maybe in future I will be leaving the Bullet out in the rain more often," he wrote.

I know this is true in my own experience.

At one point I prided myself on keeping the rear brake of my 1999 Bullet adjusted close to the drum, for instant action. Commuting home in the rain one day I noticed the Bullet was slowing. Putting it on the center stand I found that I couldn't rotate the rear wheel by hand! I slackened the brake and continued.

Not until it happened a second time did I realize that, contrary to my expectation, my brakes were stronger in the wet and they needed to be adjusted more loosely. Whether the difference was due to rusting or to the water cleansing brakes that may have become glazed with dirt and oils, I don't know.

But I know it happened.

Friday, October 14, 2011

Royal Enfield guru fixes his Bullet while he rides

My 1999 Bullet: If you ride it you should know how to fix it.
Every long ride on a Royal Enfield Bullet, the old ones anyway, features times of joy and instants of sudden worry.

She's running great today! But what was that? A noise from the motor? A hesitation?

Any change in the sound or performance of an old Bullet triggers the rider's mental troubleshooting software. Owners of newer Bullets may not be able to appreciate this litany:
  • Is that the sound of valves, wanting adjustment? New Bullets have self-adjusting valves.
  • Was that hiccup a sign of fuel starvation at the carburetor? New Bullets have  fuel injection.
  • Do I need to pull over and wipe dirt off the points? New Bullets have points-free electronic ignition.
Never mind. If you're riding an old Bullet, you can fix whatever's wrong — or, at least, you can, if you're a true "Bullet-eer."

For more than a decade B.R. Gurunandan — Nandan, for short — has defined what makes a true "Bullet-eer."

The well known Royal Enfield Bullet guru of the East has provided advice and encouragement (and, sometimes, the lash) to Bullet owners around the world.

From his Bangalore shop, his Nandan Motors website and through his Bulletech Yahoo Group (founded in 2000), Nandan has encouraged Bullet owners to think, learn and master their motorcycles.

"Befriend you bike," is the title of a helpful series of articles he wrote for the New Indian Express in 2008.

Wednesday Nandan demonstrated how it's done in a very funny and very inspiring Bulletech posting, describing his own ride out of Bangalore for vacation with his wife. The item is entitled "Escape Velocity," and you must join the Bulletech group to read it (hit the "Join This Group" button and wait to be approved). It is Message 27451.

The Bullet chosen for the trip had gathered dust while Nandan was busy with other things. Tires were low and rockers needed changing, but then it was ready to go.

"I remove the speedo-cable and toss it onto a shelf along with my mobile phone. Haven't owned a wristwatch since a decade, or that would now go too. We are ready to roll at daybreak," Nandan writes.

Thus begins a heroic tale of smooth running interrupted by sudden uneven blips in the engine note — "brrrrrrrrrrbrbrbrrrrrrbrbrrrrrrrrrrrrrrrrrrrrrr."

"Dark thoughts" occur to the rider, but Nandan instantly diagnoses the problem and solves it by yanking alternator wires loose. Yes, that works.

But it leads to a hilarious tale of consequences that our hero meets cooly, one at a time, actually modifying the Bullet as he rides.

Only those with some understanding of the electrical system (not me, in other words) will understand exactly how it's done. But that does not make the story any less inspiring.

Recommended reading.

Wednesday, April 14, 2010

Think before you 'repair' a Royal Enfield

Note the hoses on each side of the carburetor.

Anxious to start riding, I wheeled out my 1999 Royal Enfield Bullet and kicked twice. Nothing.

Never a cause for alarm! Three kicks usually will do it but, just to add a bit of insurance, I reached down to turn on the enricher. Nothing like lots of gas to cause an explosion.

Doing so I noticed that the delicate rubber tube between the air filter box and the carburetor was badly torn. A gaping hole had developed. No doubt it had been ripped by the sharp edges of the hose clamps holding it in place.

No cause for concern! I have a box of hoses I've ordered over the years and even a stout hunk of radiator hose cut to length. One of these bits would soon have me on my way.

Unfortunately, it proved impossible to get any of the new hoses onto the air box outlet. Too tight.

No problem! I wheeled the Bullet into the garage and a few moments with a wrench had the air box off. Now I could really lean on it with all my weight. But the hose still wouldn't go on, no matter how I stretched it and pushed.

Not beaten yet! I called to the wife to start boiling water to soften the hose. We'll have this baby on the road in no time! A bit of a soak in a pot of boiling brew and — no — it still wouldn't go on.

Never say die! I pulled out a round file and began scratching away at the inside of the length of radiator hose. I would open it up a little bit to make it fit, I thought.

Much huffing and puffing later it was apparent that the radiator hose would never go onto the air cleaner outlet no matter how much I filed. Radiator hose is tough stuff and it had a long way to go before it would fit.

Now, I slowed down and started to think, which is what I should have done in the first place.

I finally realized that the hose bits weren't wide enough to go on the air box because they were made to connect the carburetor to the motor. A wider hose (which I didn't have) connects the carburetor to the air box.

Two sizes of hose! Of course. Probably has something to do with narrowing the air passageway to speed up the flow of the gas/air mixture into the engine. What genius these engineers have. But, now what?

The answer gently dawned: the air hose from carburetor to motor is absolutely critical since any air leak here thins out the mixture carefully produced by the carburetor.

But the air on its way into the carburetor from the air cleaner is nothing special. It's just air, and if it gets mixed with a little more air, that is no problem.

I ruefully realized that I probably could use a toilet paper tube for this connection; in fact, I was tempted to do so, just to show the Bullet how much I appreciate being the fool.

No. That would be wrong. It wouldn't be waterproof and there might be enough suction from the Bullet's mighty 500cc motor to collapse the cardboard.

I got out some black plastic tape and repaired the original hose. As I did so, I noticed that it had tape on it from the previous time I'd done this.

And we were off!

Thursday, November 19, 2009

Big sprocket equals more speed? Maybe

Want to make your Royal Enfield Bullet go faster? Why not just increase the size of the front sprocket? That means that, without increasing engine rotations per minute, the rear wheel will turn faster. And away we go! Maybe.

"Andy" in Callahan Florida happens to be selling a 2002 Royal Enfield and notes in his ad that it has a 22-tooth front sprocket. That's the biggest they make. I asked him what it's like.

"I find the 22-tooth is better for the top end (but) you have to rev up a little more to start off. I have no power problems 'at all,' possibly since Florida is flat.

"I still have the same problem as before though: it only revs so high with the stock carb so top speed is still limited but about at 77 mph instead of 68ish. I weigh 190 lbs and I usually carry about 5 to 10 pounds in my side bags. As far as shifting down (for hills, in traffic), no! It didn't make that much of a difference. It made a difference but not a considerable amount.

"I actually wish it did take me to the point where third was more cruisable but I still pass it by and ride in fourth going 40ish and it pulls real good and maybe even better than the stock gear when riding with the big dogs; they actually can't pull away from me 'til I top out, then I am toast."

He adds:

"If they made a 25 or 26 tooth I would buy it to try out and cruise third on the steep bridges and hit forth on the down hills and flats to push 85-90."

Like many owners of original Bullets, I have increased the size of my own front sprocket.

My 1999 Bullet 500 came with a 17-tooth front sprocket and 38-tooth rear. Using the Dropbears.com Sprocket Ratio Chart, my original ratio was 2.24. The change to an 18-tooth front sprocket brought the ratio down to 2.11. That's a change of just about 6 per cent. Sounds modest.

My wife added the discarded 17-tooth sprocket to a very nice shadow box she made for me.

On the road, the improvement was phenomenal. There was no noticeable difference in the way the motorcycle accelerated from a standing stop. Presumably, my educated left fist was smart enough to release the clutch just the right amount to compensate.

What was different was that I no longer needed to shift to second half way through the intersection. I could actually hold first long enough to get across, building up some real speed. The time saved by not having to shift gave me a bit of a jump on traffic.

Second lasted longer, too, and third, previously a milquetoast gear, was now a tiger, good for all sorts of situations that previously would have had me lumping along in fourth. The 18-tooth front sprocket was such a good idea, and so popular, that Royal Enfield eventually made it standard on the 500.

The only problem in the old four-speed bike was the huge jump up to fourth, which now felt like overdrive. This is where you confront the fact that you don't really have much power. Fourth was a real show stopper for my unmodified Bullet but — oh well — it was good for cruising.

"Top Speed" on my Enfield is a concept more influenced by wind direction than gearing. But I will say that casual cruising speed seemed to bump up a bit, from 38 mph (indicated) to 41 mph.

Now let's use the Dropbears chart to try out a 22-tooth front sprocket. The ratio is now 1.73! That's a 23 per cent change from my original 17-tooth wheel and fully 18 per cent from even my upgraded 18-tooth sprocket.

It's hard to imagine. But I would love to give it a try.